2-10. Add legends for a WMS
Some WMS services expose a legend graphic via GetLegendGraphic. When they do,
the CB can pull that legend straight into your layer card.
Add the Copernicus Urban Atlas layer
- Create a new layer called Copernicus Urban Atlas and place it in an interface group called Land Cover (create the group if it doesn't exist yet).
-
Add a dataset using Direct Connection, with Data Format set to WMS. Copy the values below into the form:
- Data Source URL
https://image.discomap.eea.europa.eu/arcgis/services/UrbanAtlas/UA_UrbanAtlas_2018/MapServer/WMSServer- Layer Name
Land_Use_Raster1402
Copy the legend into your configuration
-
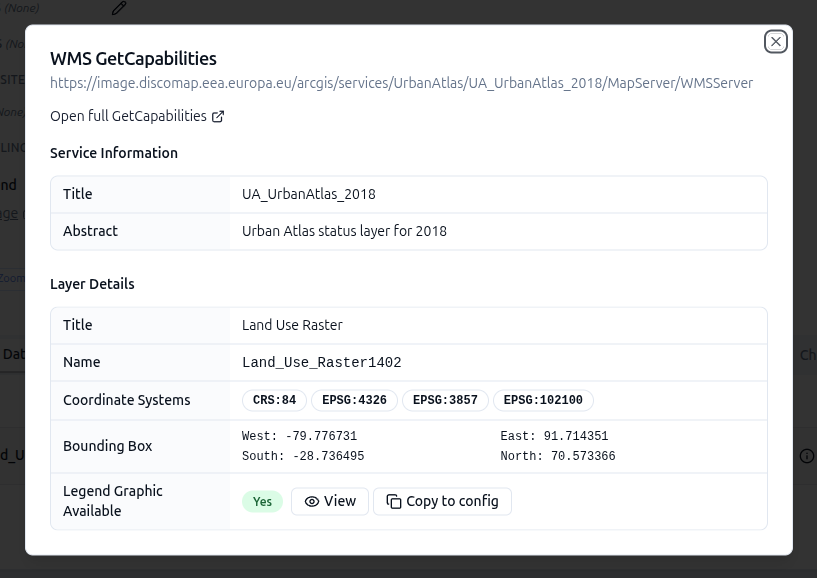
On the dataset row, select the (i) info icon to open the metadata dialog. Note that it reports Legend Graphic Available: Yes.

-
Select View first to take a look at the legend graphic the server publishes.
- If you're happy with it, select Copy to config to attach the legend to the layer card.
If no legend graphic is available for a service, edit the layer card and point the Legend image URL at any publicly accessible PNG — for example a legend you've curated yourself.
Preview the result
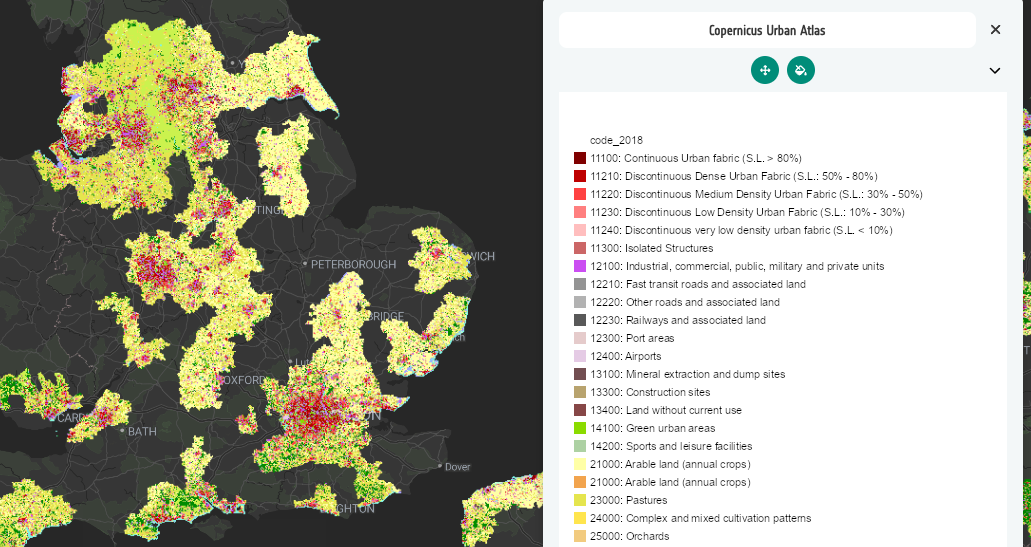
Go to Preview, enable the layer, and open its info panel. The Urban Atlas land-use classes render on the map with the copied legend alongside.
Did you remember to export?
If not, now is a good moment.